
Your contacts are the foundation of everything in Soniq Studio. Well-maintained student records mean accurate booking confirmations, correct invoices, and cleaner communication. This guide covers the key things you need to know.
Adding a new student
To add a student, click Add Student from the Dashboard or the Students section at the bottom of the page. The Add a New Student dialog will open. Fill in the student’s full name, their email address, and their lesson price.
The email field shows a note: No emails are sent when you create a student — so you can safely add a student without worrying about triggering any automated messages at this stage.
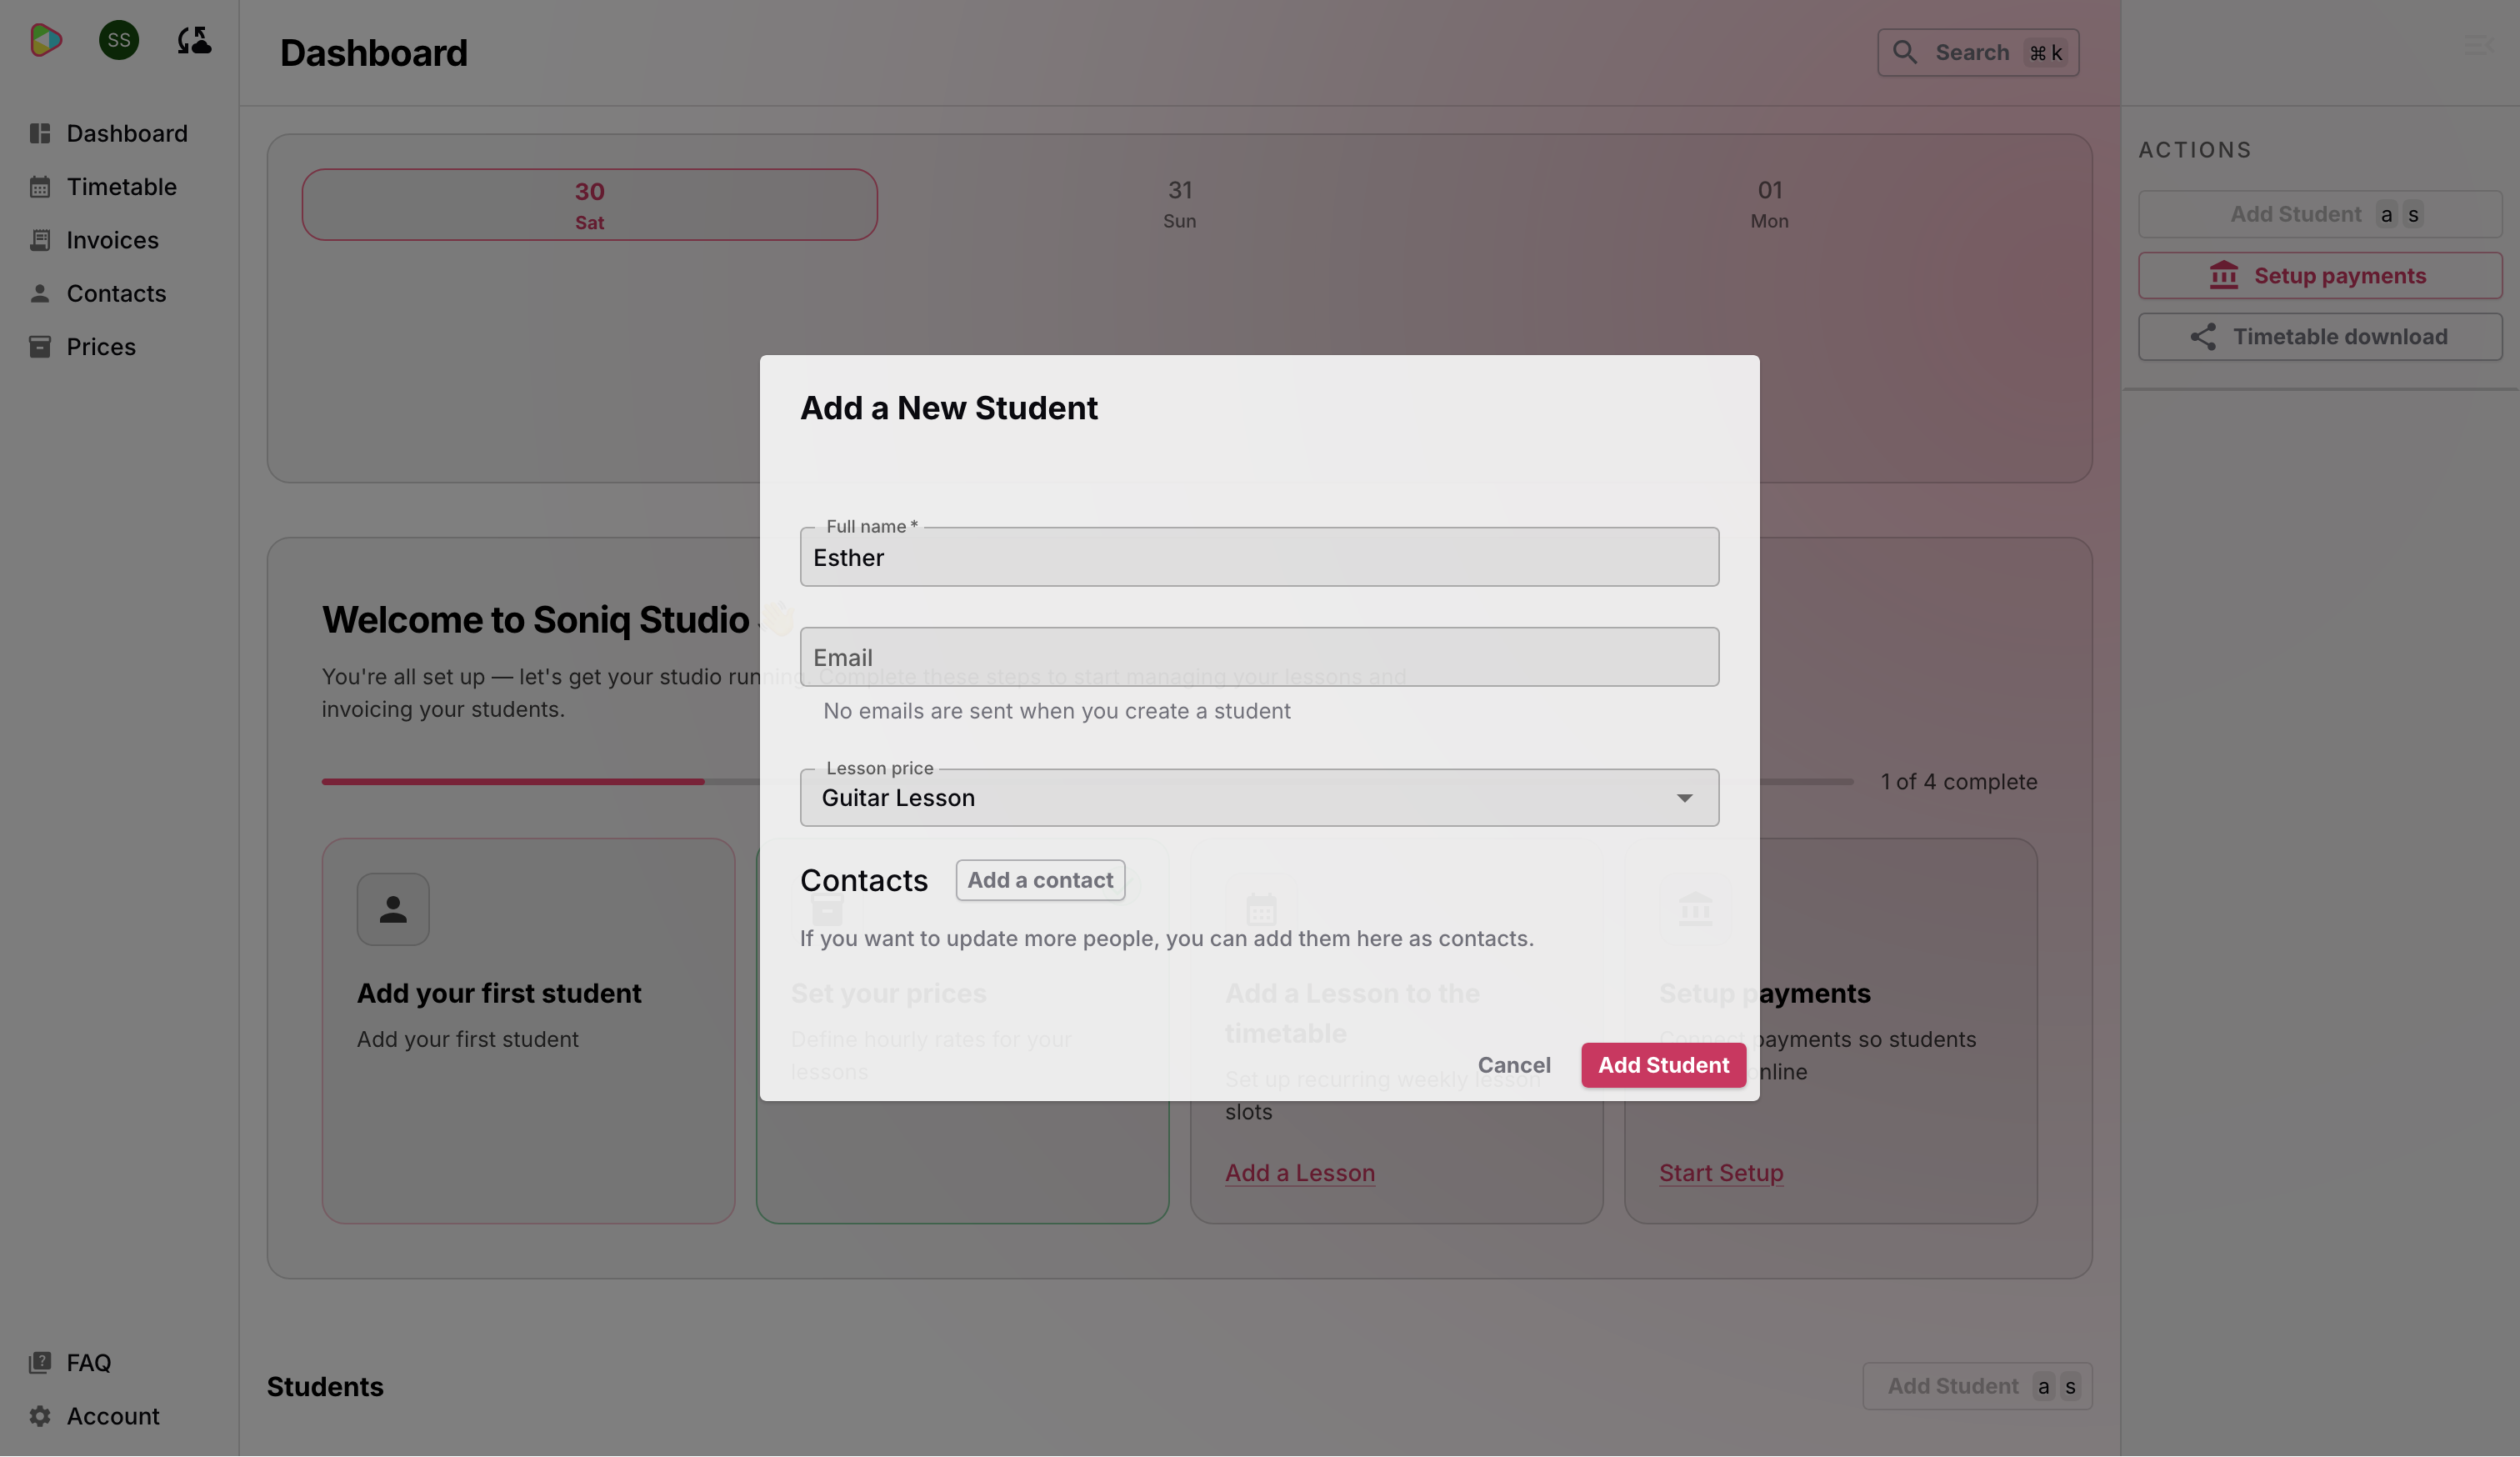
You’ll also notice a Contacts section at the bottom of the dialog. If the student has a parent or carer you want to link right away, you can add them here before saving — though you can also do this later from the student’s contact page.
Linking parents and carers (Connections)
When a student doesn’t have their own email address — or when a parent handles all the admin — you’ll want to link a parent or carer to the student’s contact record. This lets you control who receives invoices and messages.
If you didn’t add a connection when creating the student, open the student’s contact page and find the Connections action section on the right-hand panel. Click the pencil icon next to Connections to open the dialog.
The Add allows you to create a new connection. From the Contact dropdown, choose Create a new contact to add someone who isn’t in Soniq Studio yet. Fill in their name and email address, then set the Relationship — you can choose Parent, Carer, or Not applicable.
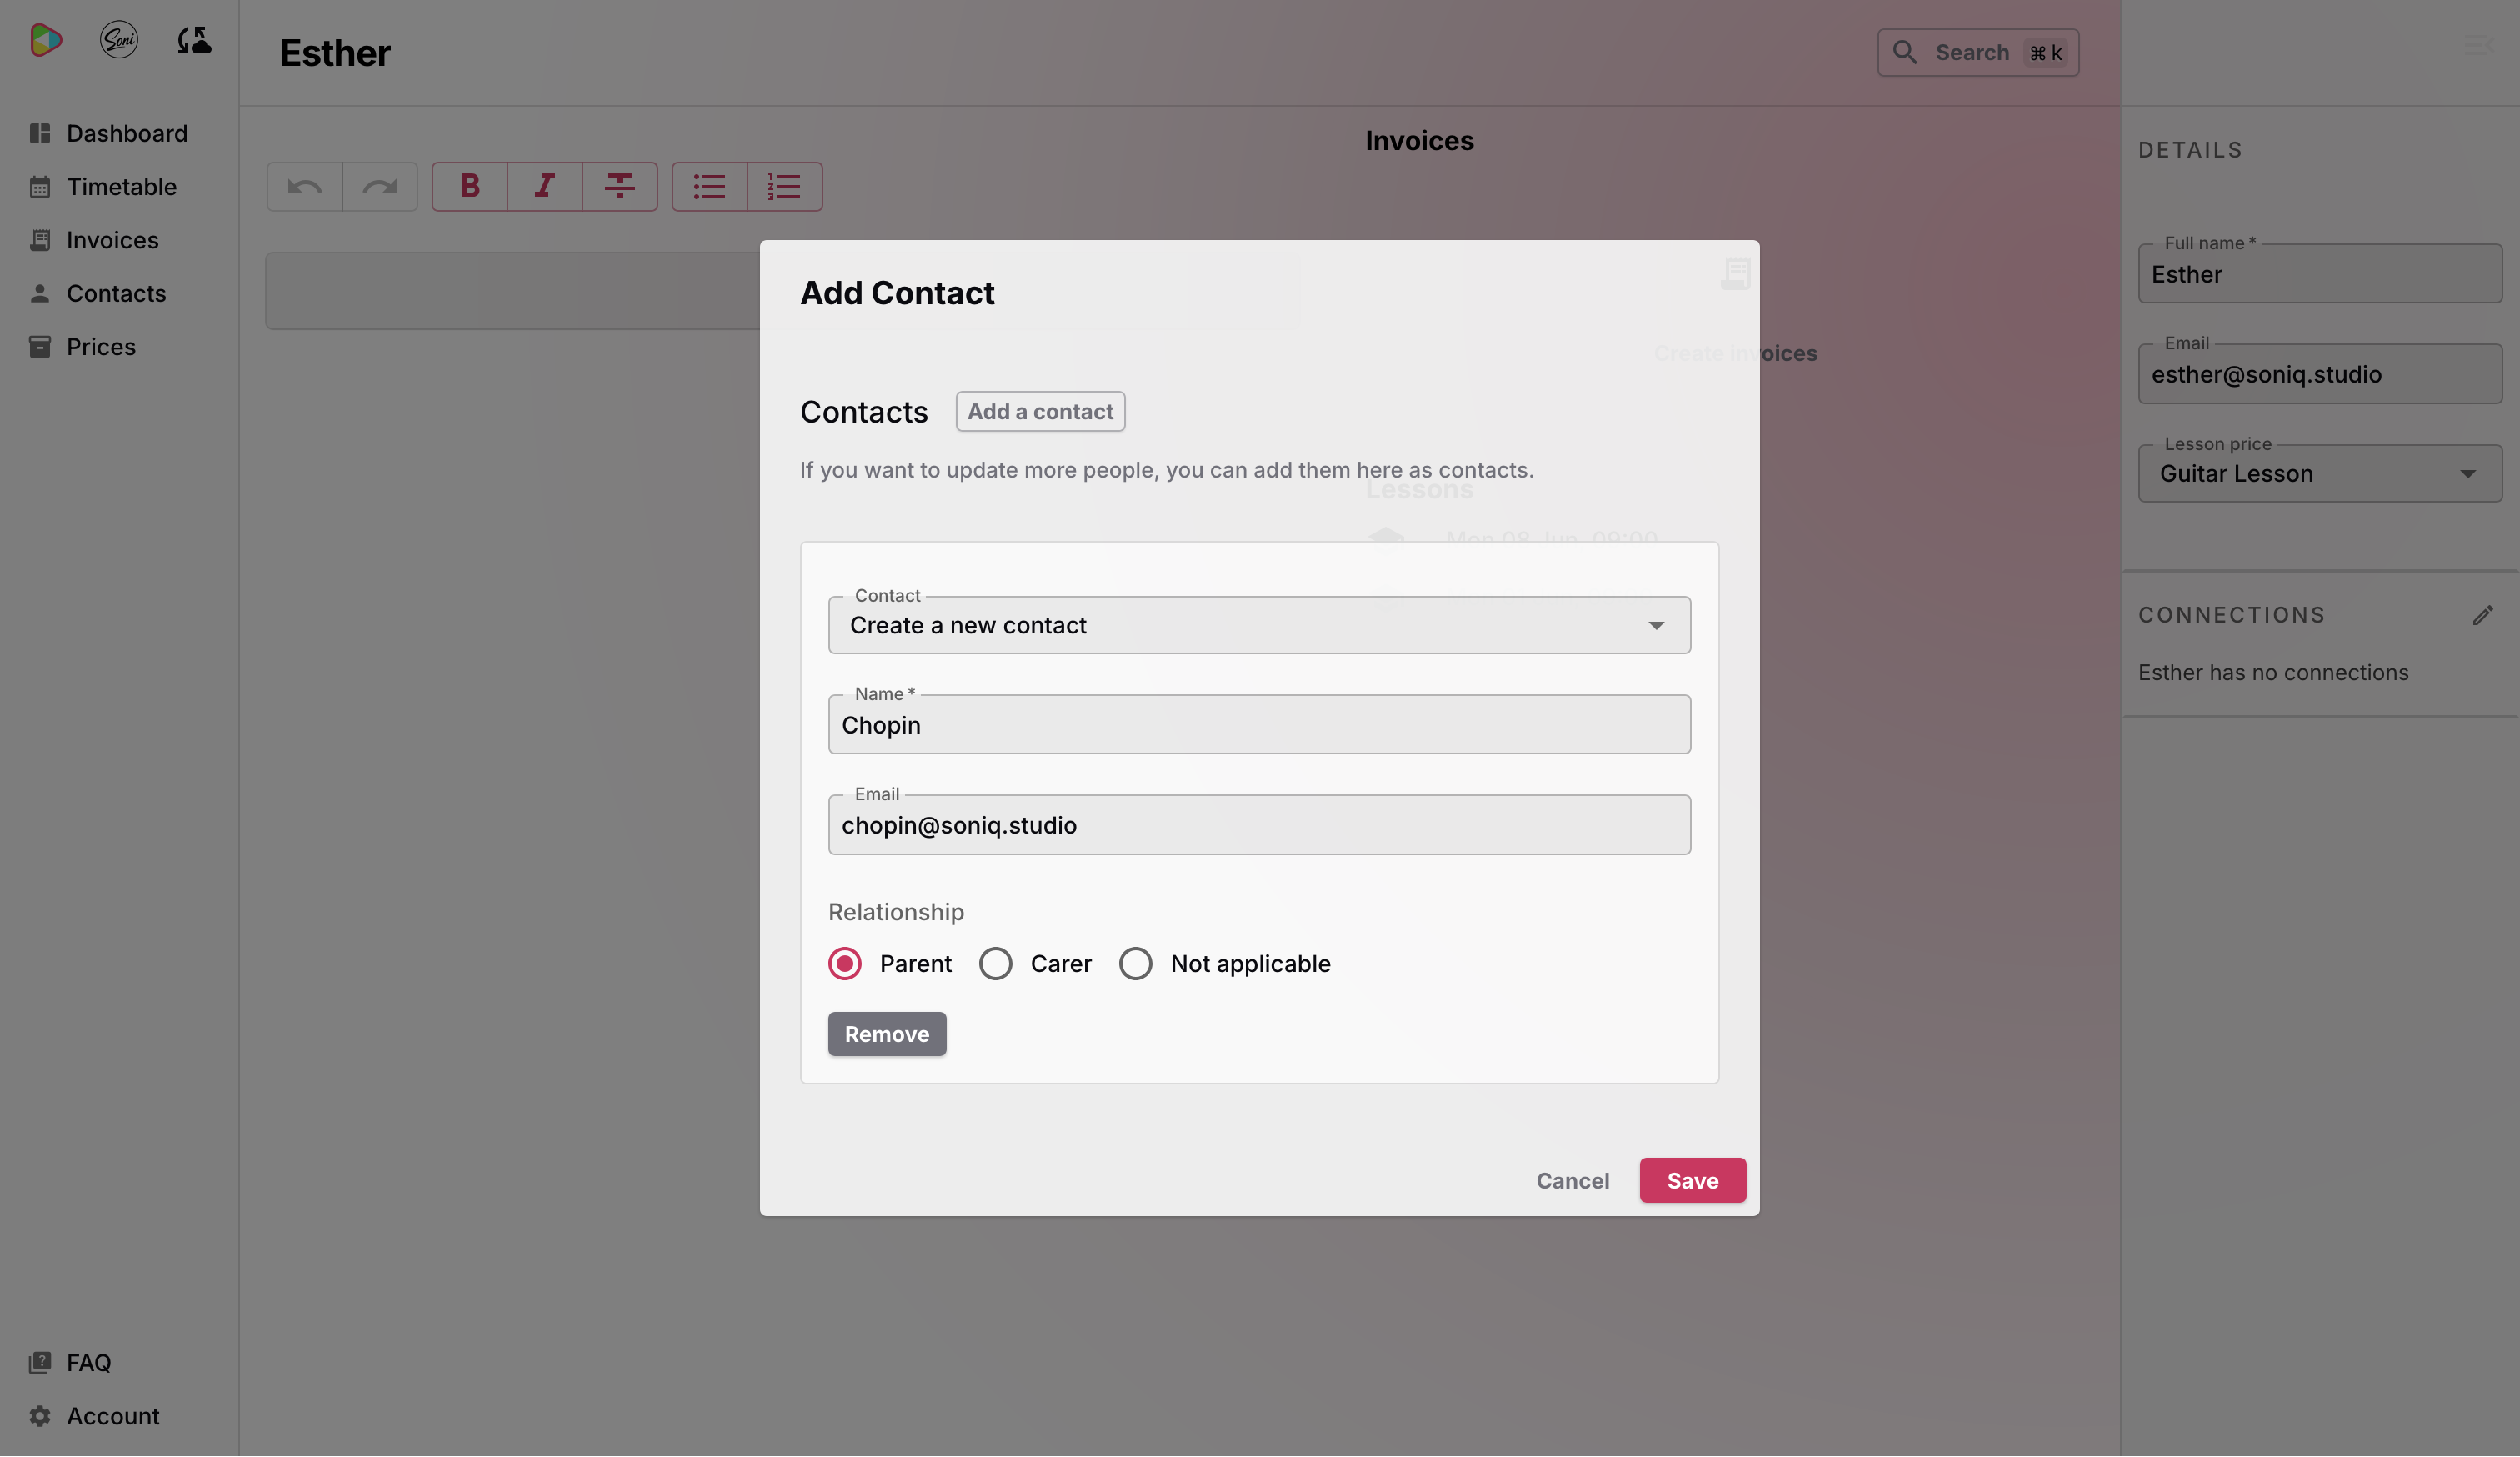
Click Save and the connection will appear under Connections on the student’s contact page.
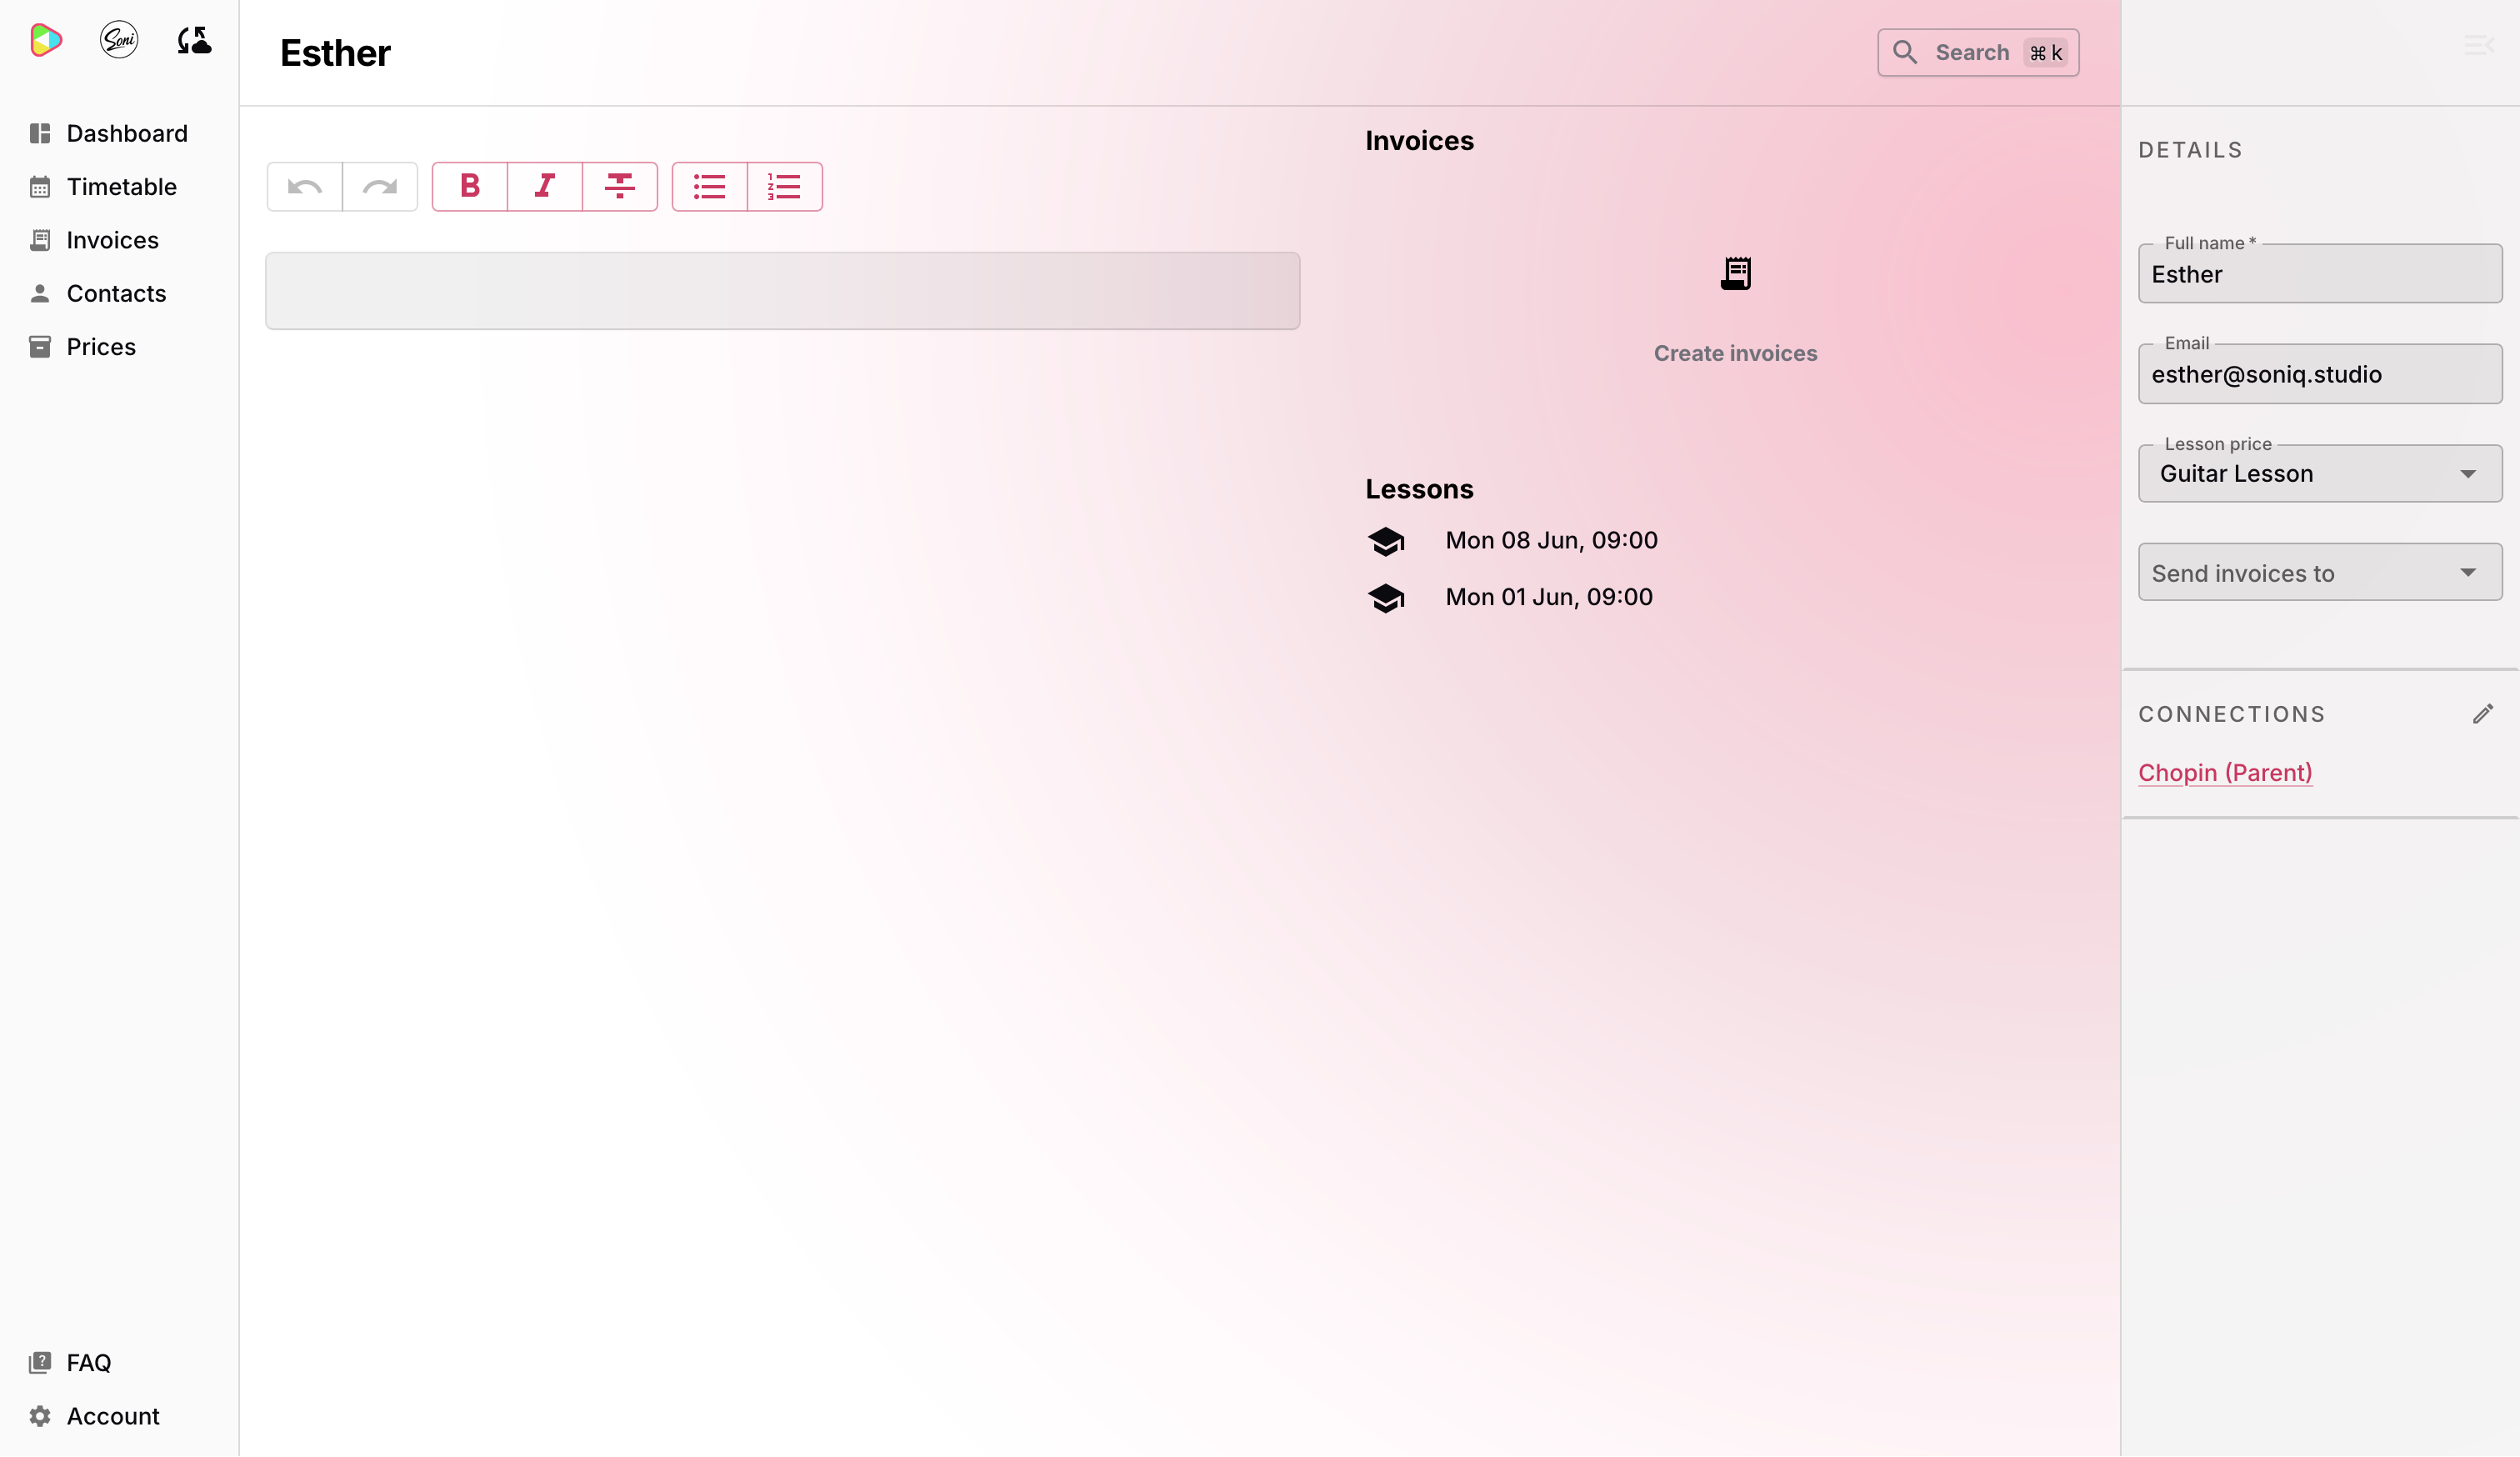
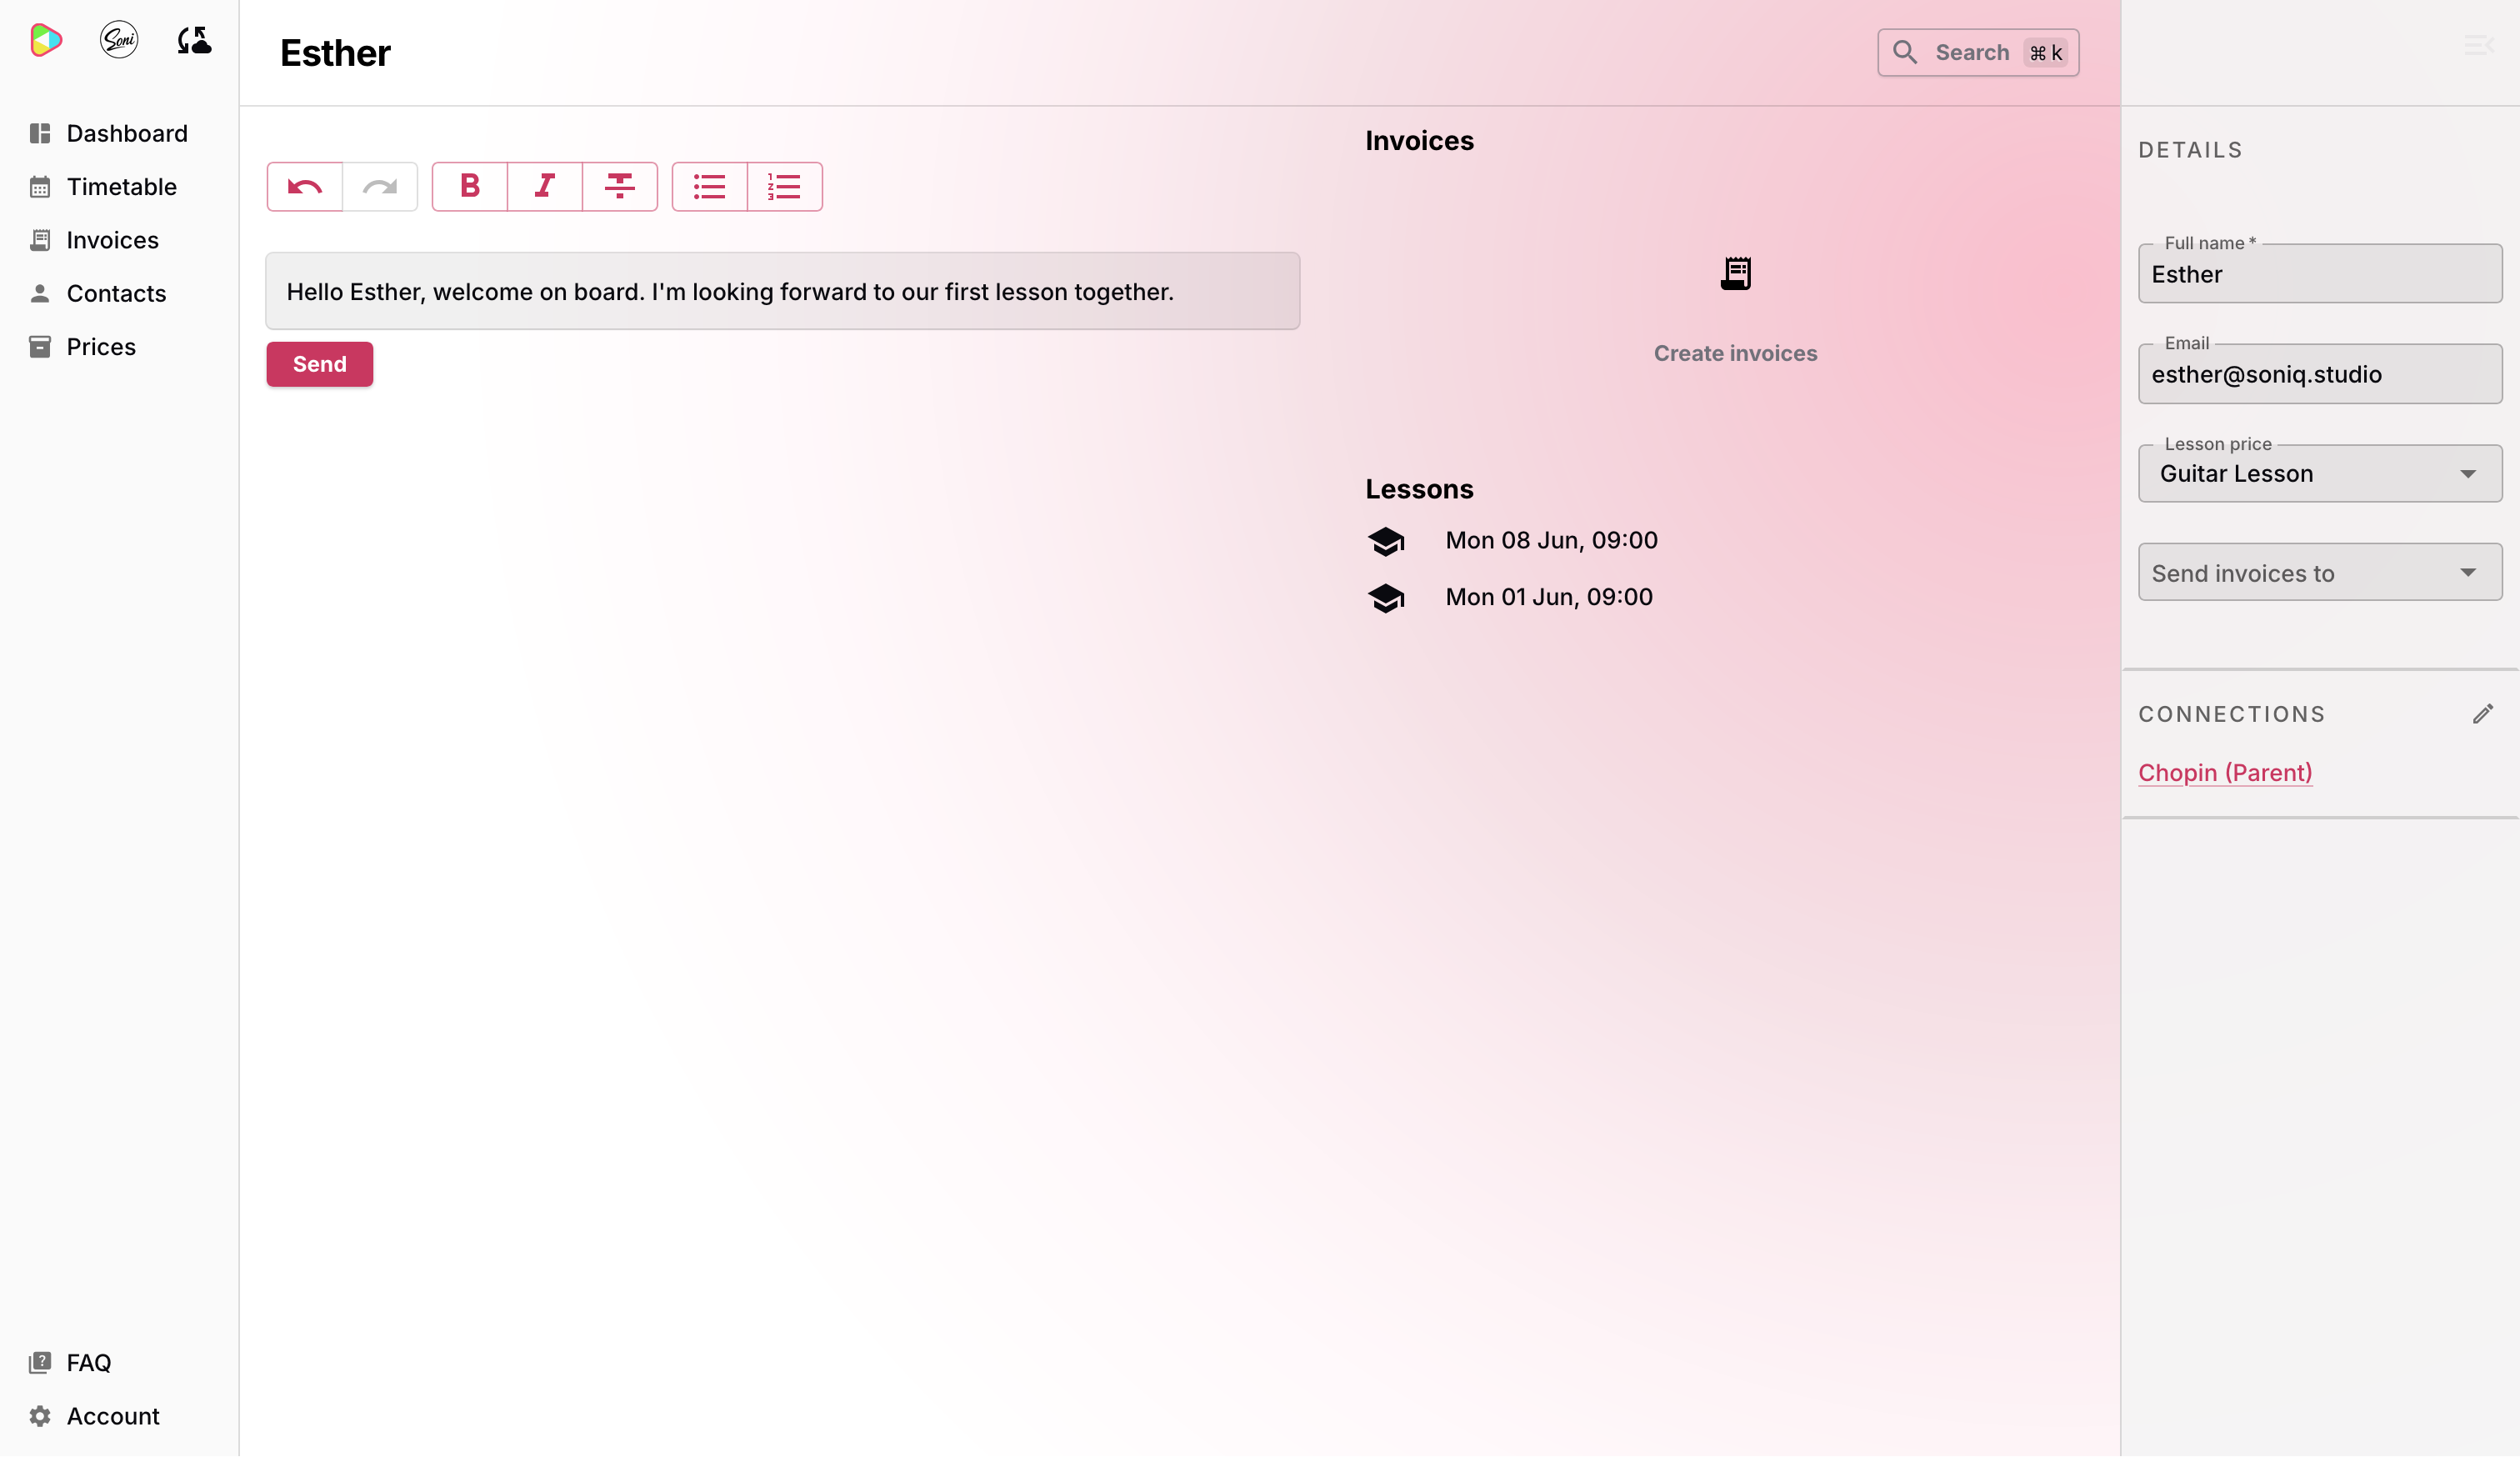
Once a parent or carer is linked, a Send invoices to dropdown appears in the details panel. Use this to choose whether invoices go to the student or to the linked parent — handy when a parent is paying but lessons are booked under the student’s name.
Sending messages
You can send a message to a student directly from their contact page. The compose area sits at the top of the main panel.
Before you can send, the student needs an email address on their record. If there isn’t one, you’ll see a warning at the top of the page. Use the action section called “Details” in the right of the screen (or in the right side drawer if you were on mobile) to update the email address.
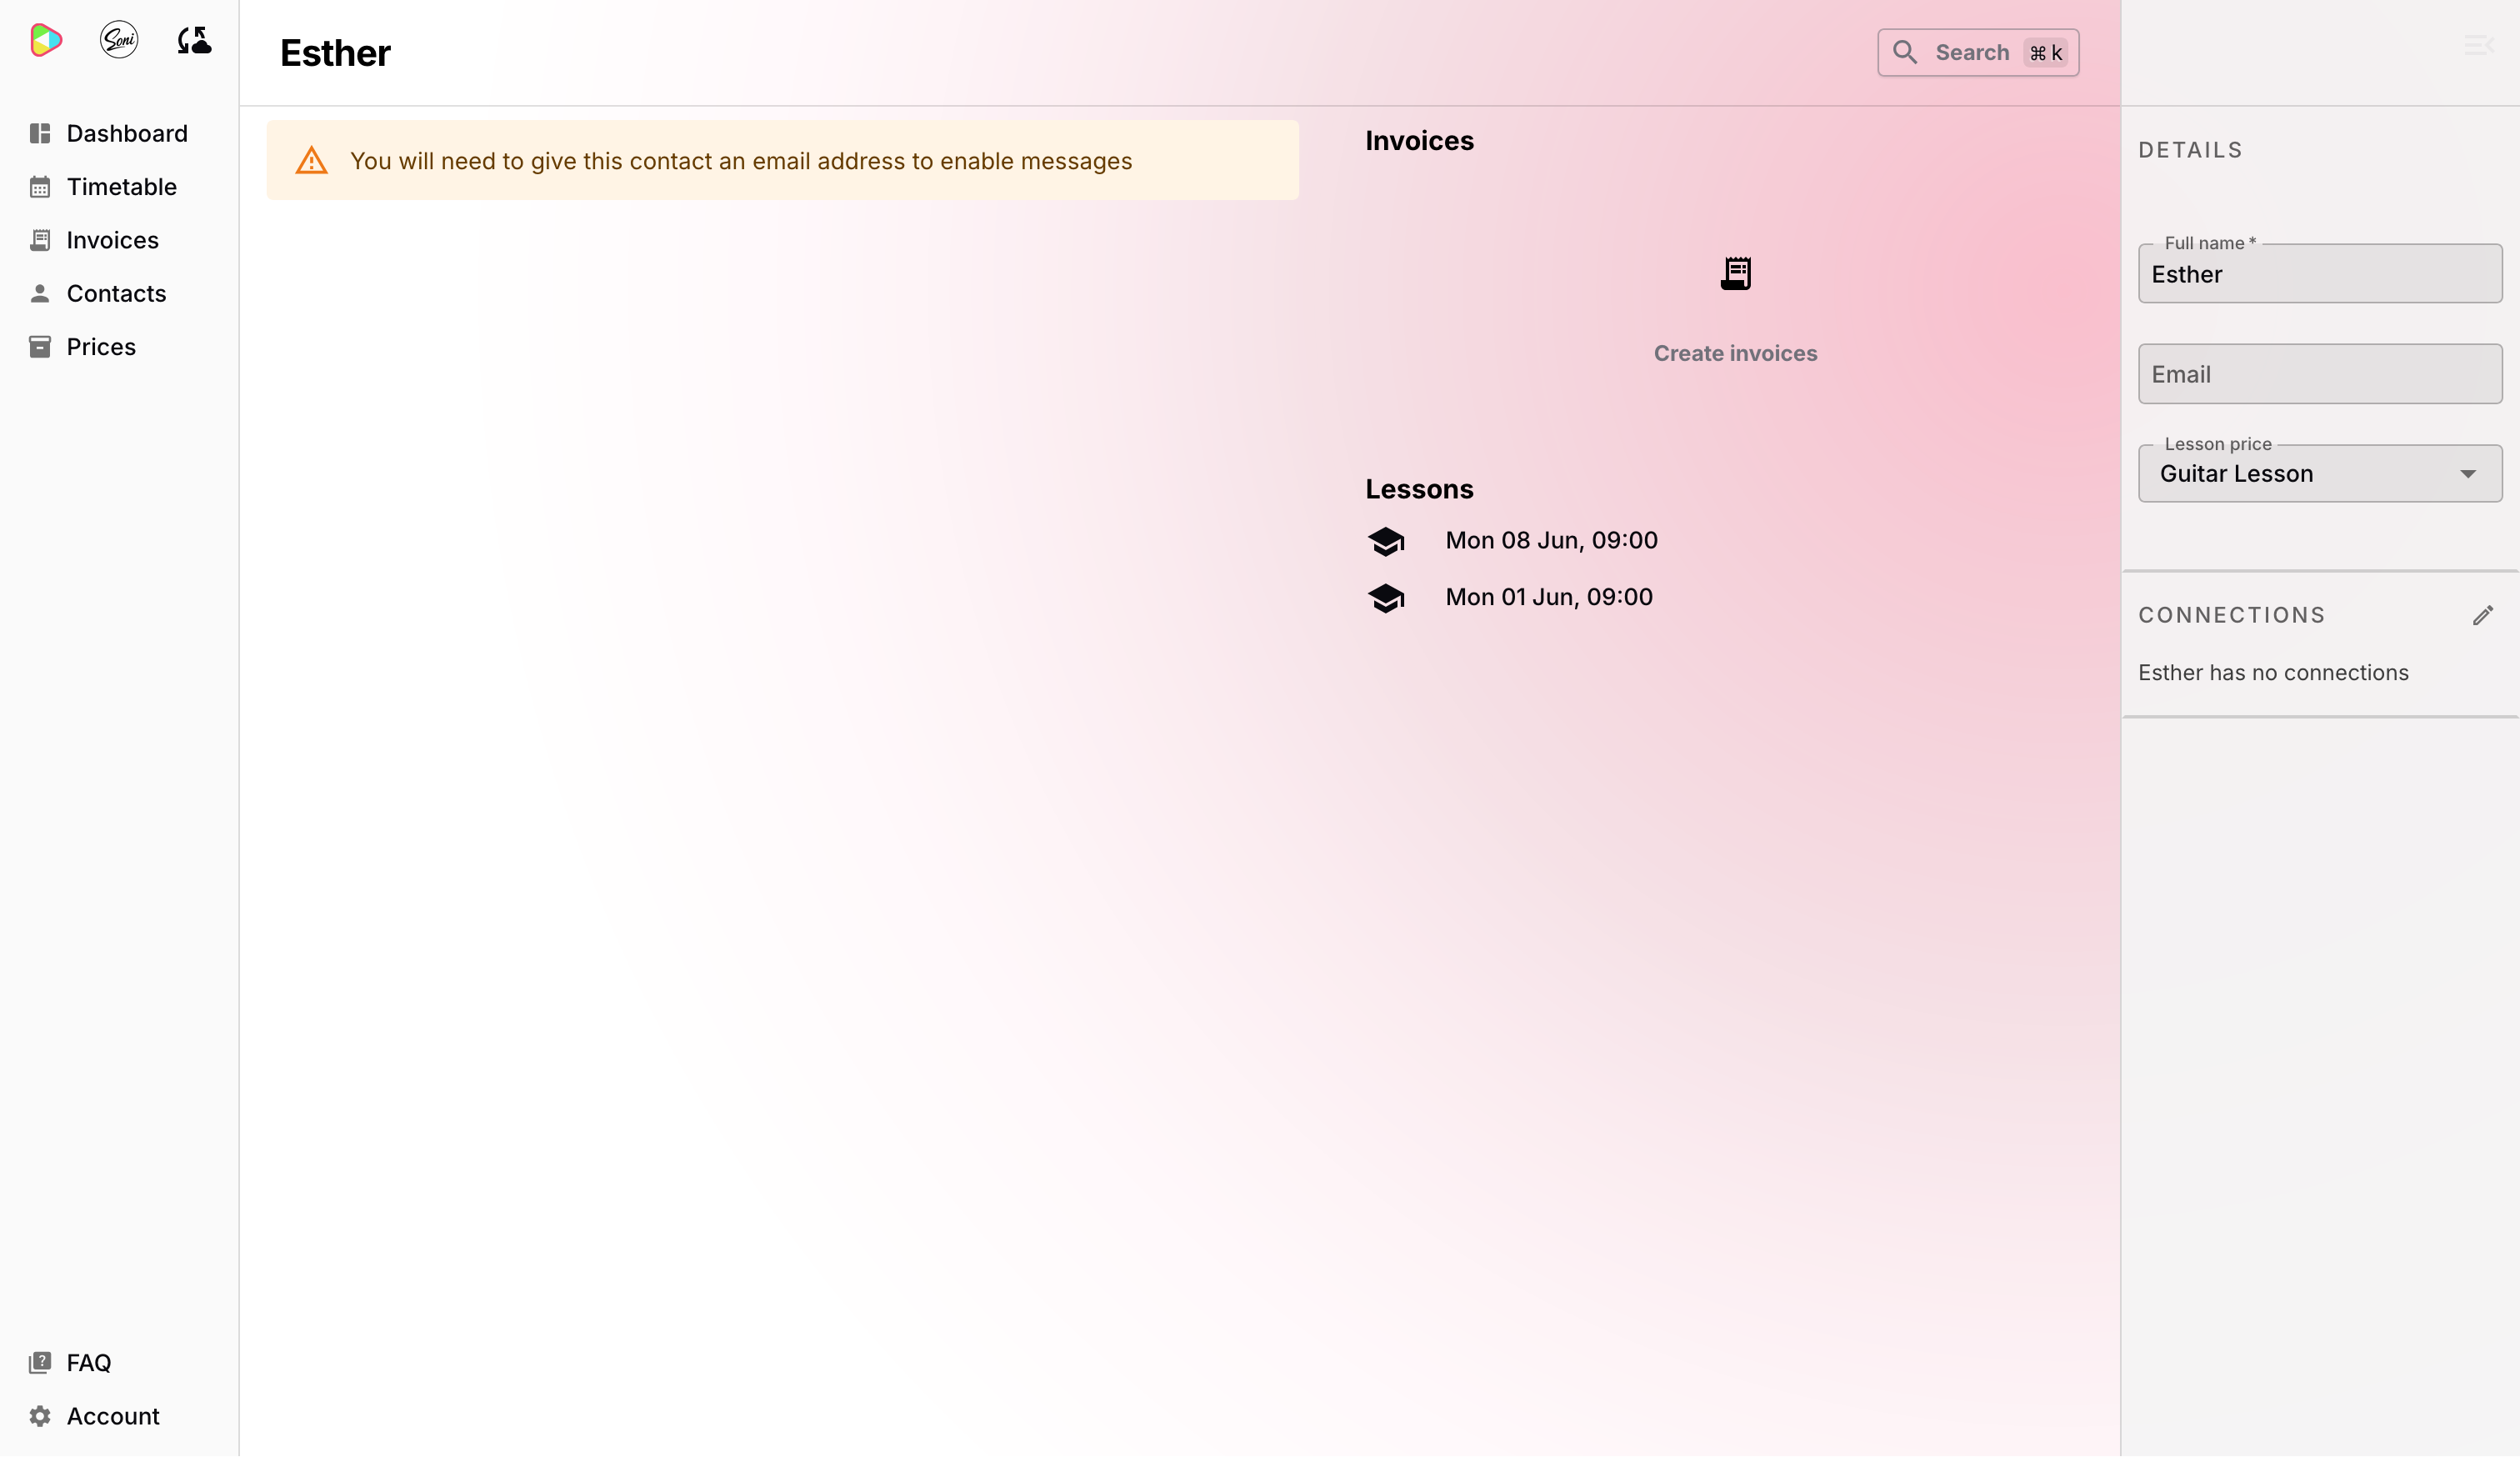
Once an email address is saved, the compose area becomes active and you can type your message.
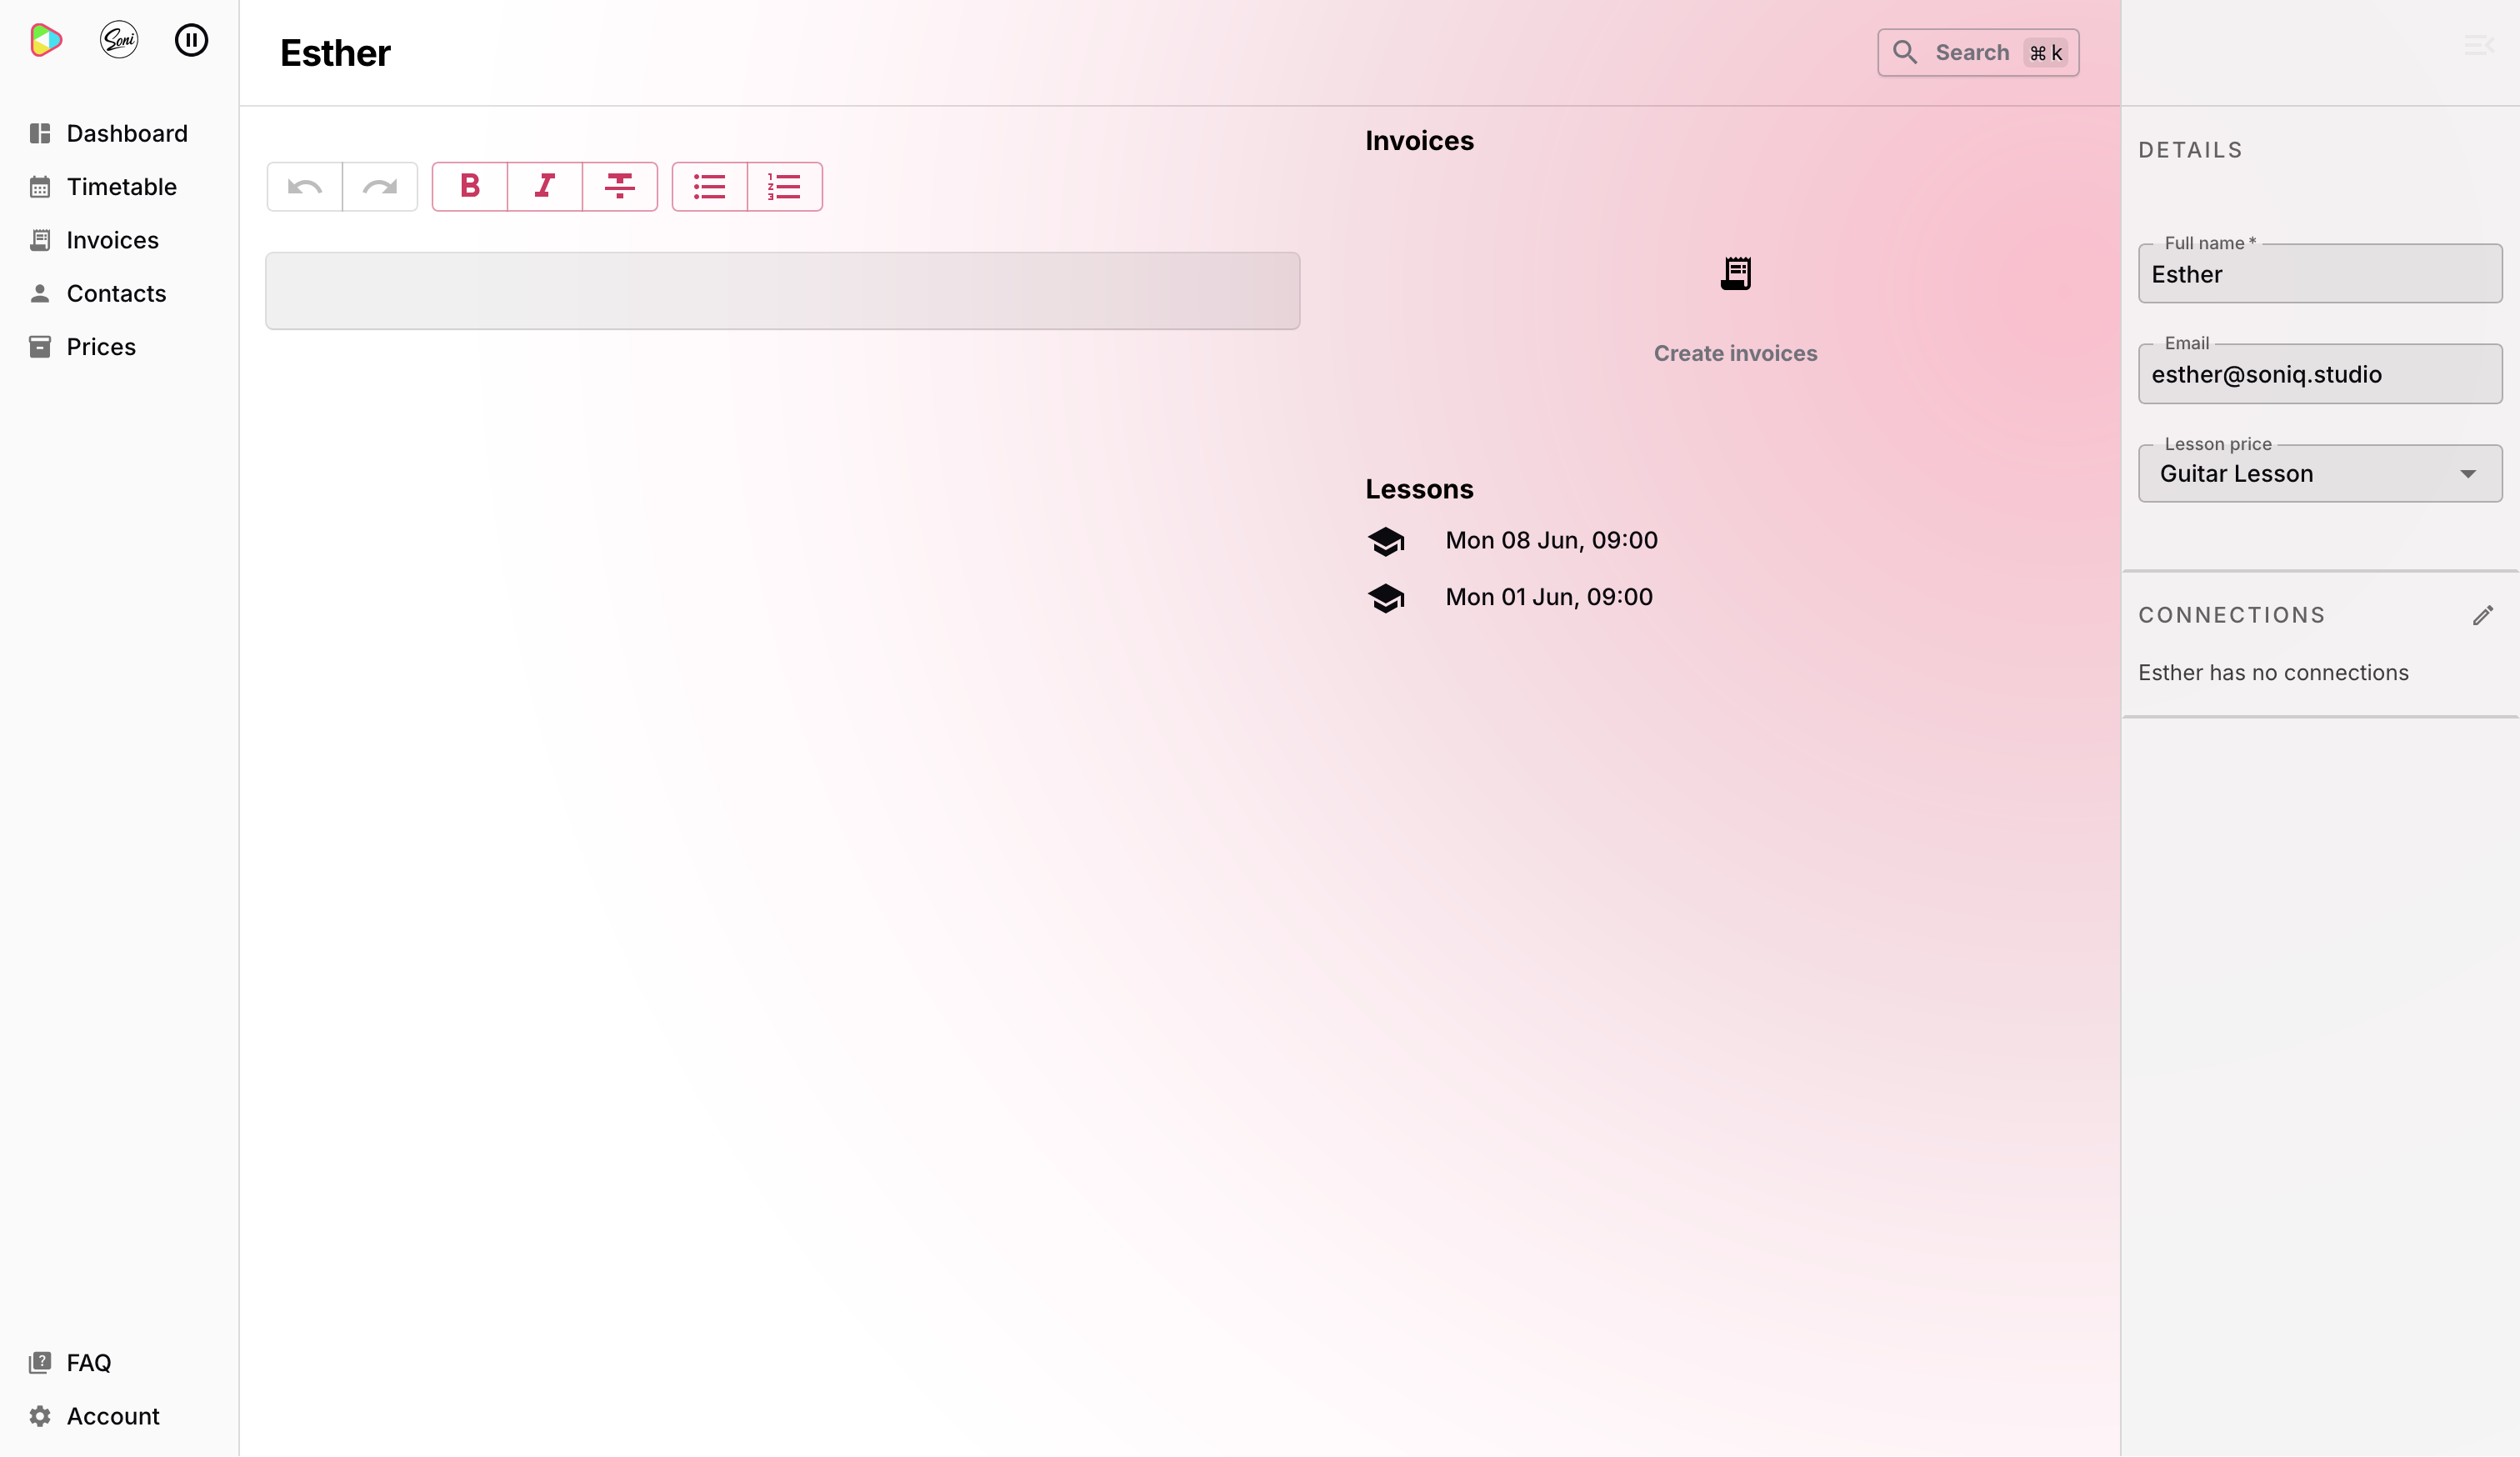
Type your message and click Send.
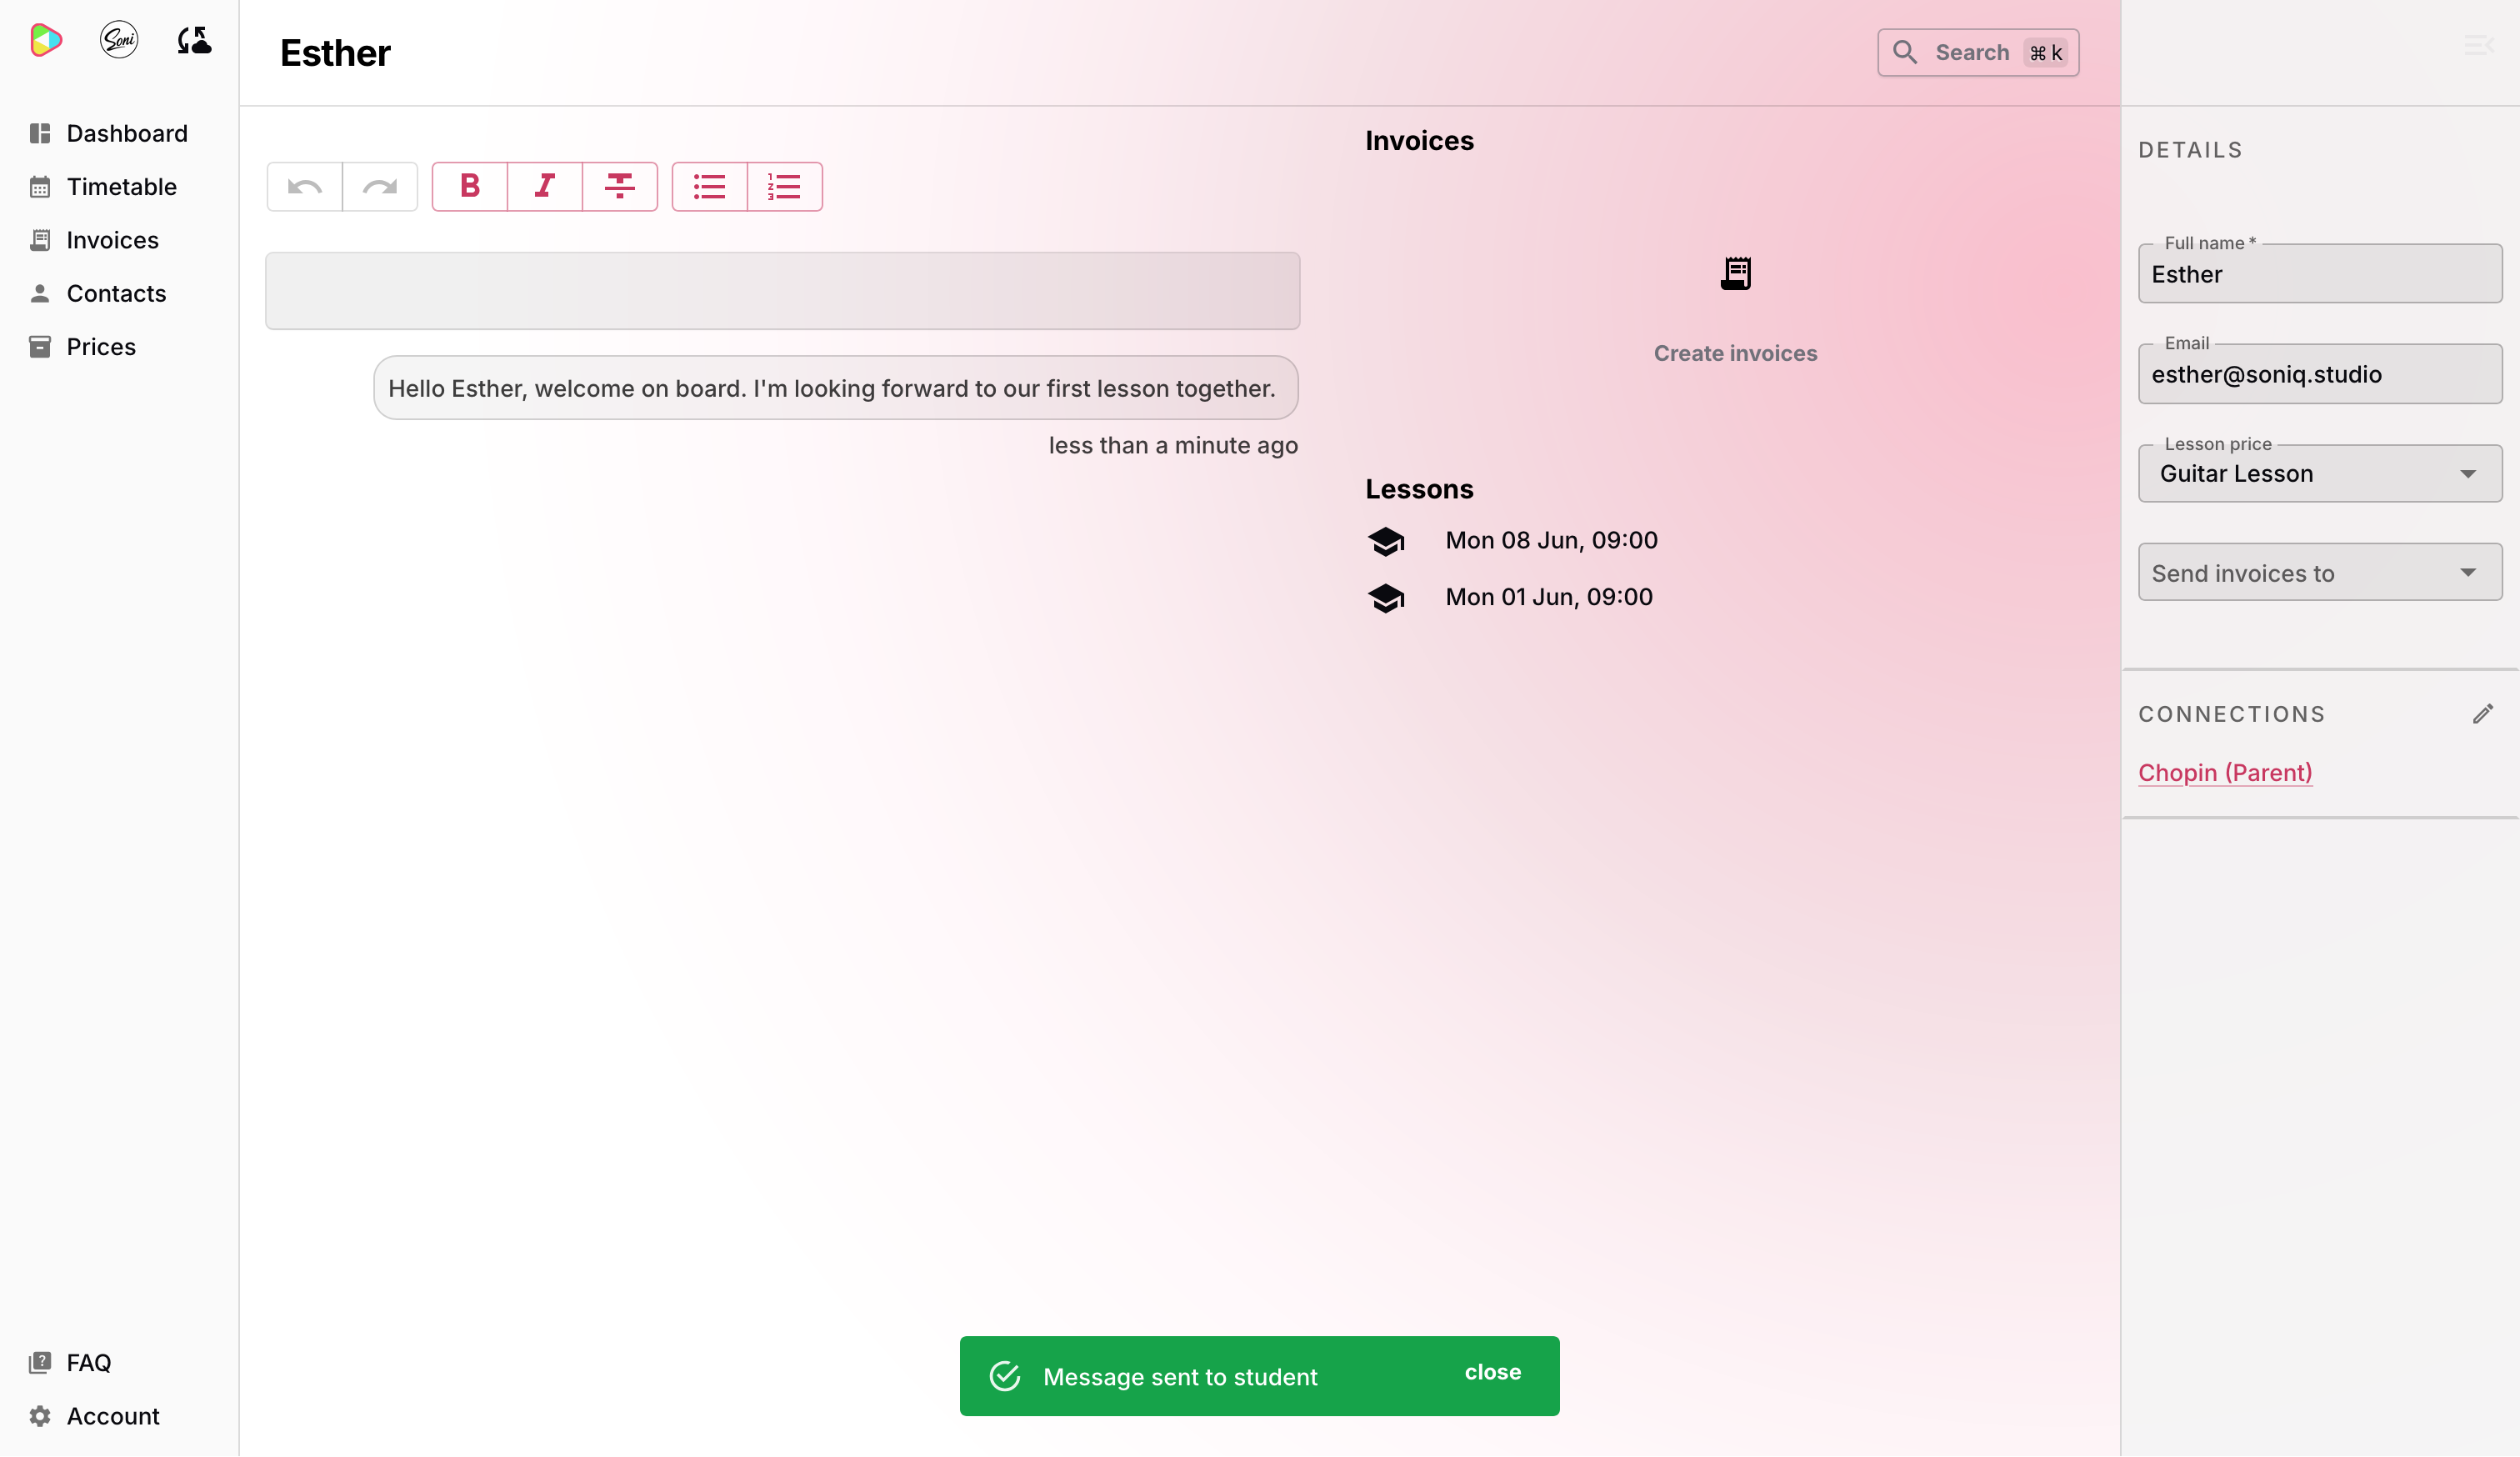
The message appears in the contact’s history and a confirmation toast shows at the bottom of the screen.
Soni uses this to send a quick welcome message to each new student before their first lesson — nothing elaborate, just a friendly note to confirm the time and let them know what to bring.